Rob Kraft's Software Development Blog

Software Development Insights

Archive for the ‘Dev Environment’ Category

CI/CD – Is It Right For You?

Posted by robkraft on July 6, 2021

Prologue:  Software Practices Are Only Best Within Specific Contexts

Have you ever attended a conference session with a presenter that is very passionate about a new process?  They believe that everyone should be using the process.  Often, I have doubts that the process will work for my team, but the presenter seems to imply that I don’t fully understand what they are attempting to convey; and perhaps I just need to start trying to make the change to realize the value of it.  While this could be true, I have learned over the years that many people pitching process changes that provided enormous return on value for their software development teams, are pitching solutions that might not work well for other software development teams.  The presenters are not trying to sell me something I don’t need, and they are not being dishonest, they are usually just considering their solution from a single context.   

And what do I mean by context?  A context is the processes, people, tools, networks, languages, deployment models, and culture in which software is produced and deployed.  A practice that is optimal in one context may not be optimal in another, just like the best practices for building a house may differ from the best practices for building a bridge or a skyscraper.  Some aspects of context affect some best practices more than others.  For example:

  • Your deployment model is an aspect affecting the processes you choose.  It is possible to use the CI/CD process when you deploy to a web app, but impossible to use CI/CD when deploying software to chips that are embedded in the engines of airplanes.
  • StandUp meetings might be ideal for a scrum team with all members co-located and starting work at the same time; but a waste of time for a team of four all sitting at the same desk doing mob programming.

This series of articles looks at software practices one by one to highlight what contexts each practice may work well in, and contexts where the practice may not work well, or may even be counter-productive.

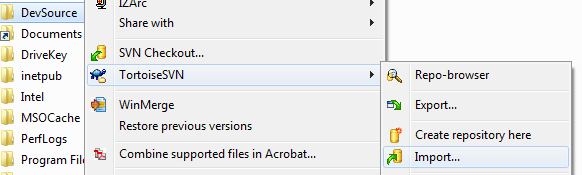
Here is an example of a context constrained best practice.  After graduating from college, a developer created static web sites for years, modifying html pages and JavaScript and committing code changes to GitHub while also maintaining a web server and uploading file changes to the web site using FileZilla.  But then he discovered Netlify which uses the JamStack process which makes it incredibly easy to commit his changes to GitHub and have them validated, compiled, optimized, and automatically deployed to the production web site.  Now he is telling everyone they should use JamStack and Netlify for all web development.  And perhaps they should, if they are deploying static public web sites.  But some developers are deploying to internal web sites.  Some developers have database changes and dependencies on code from other teams.  Some developers have mission critical applications that can’t risk ten seconds of downtime due to an error in production.  These are different contexts and the Netlify/JamStack approach may be undesirable for these contexts.

In short, any “best practice” applies within a specific context, and is unlikely to apply to all contexts.  We need to identify the best practices that we can apply to our contexts.  Some people are dogmatic about their ideas of best practices.  They believe a process should always be applied in all software contexts, but personally, I think there may be no software practice that is always best.  I think there are many contexts in which some process recommendations are poor choices.

Subsequent articles will examine processes one at a time, explaining why the processes are poor choices for some contexts.  The list of process recommendations that will be shown to be poor choices in some contexts include the following: Scrum, TDD, Pair-Programming, Continuous Deployment (CD), Story Points, Velocity, Code Reviews, Retrospectives, Management By Objectives (MBO), and metrics.

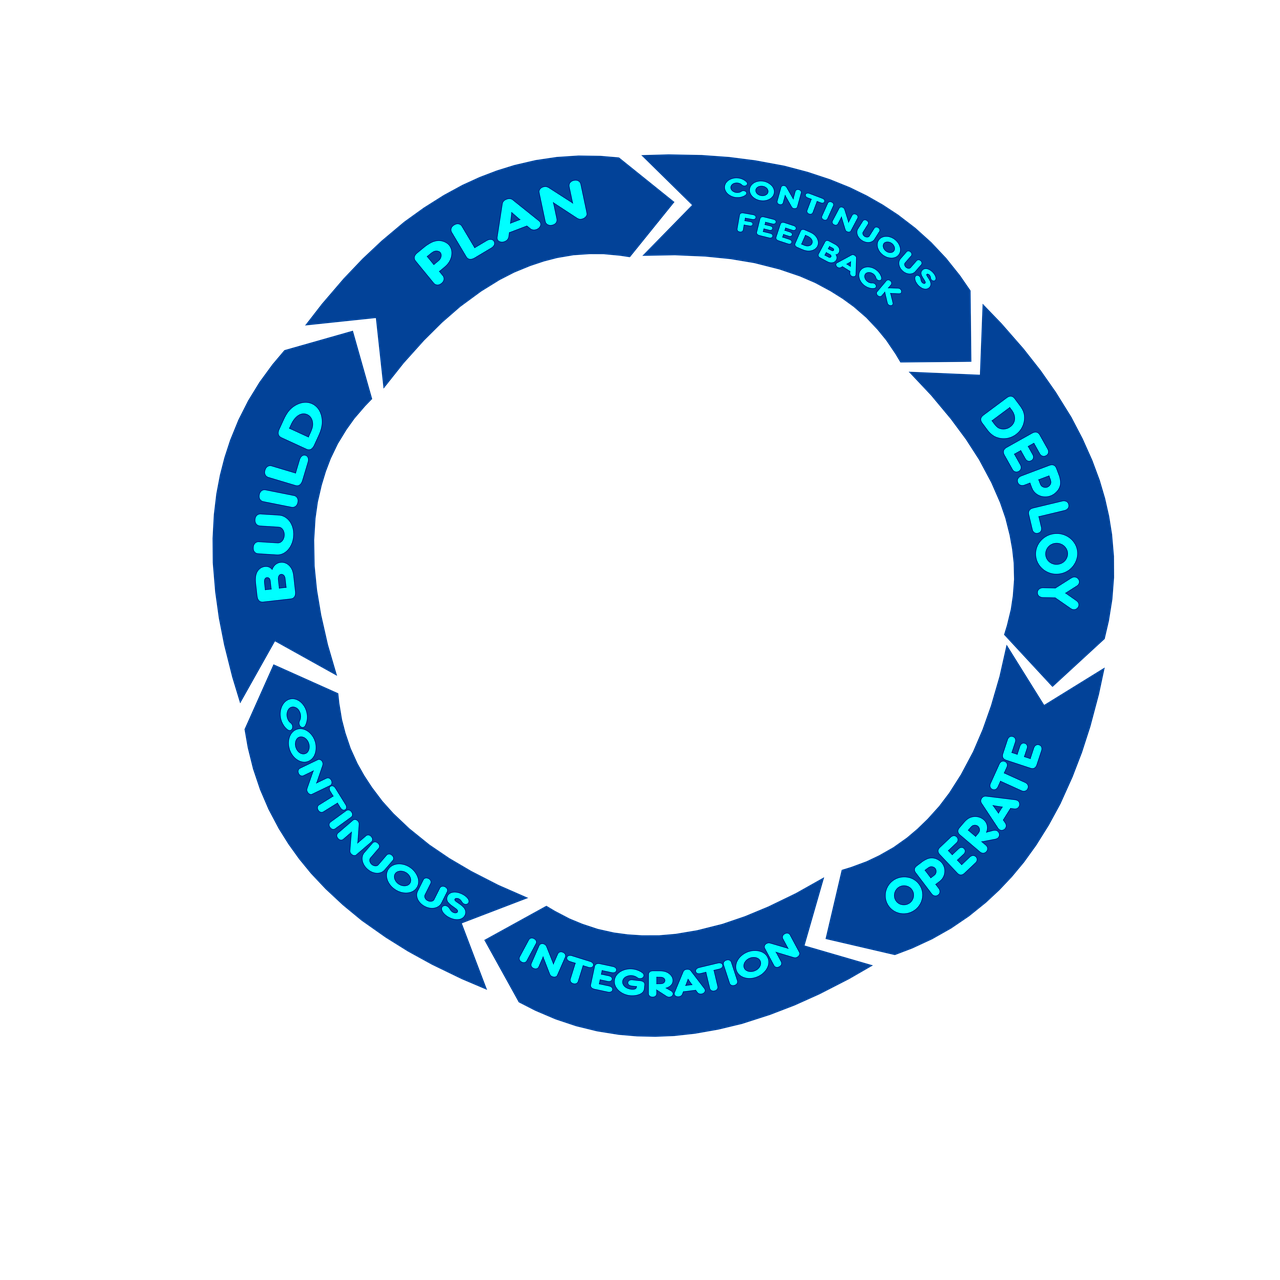
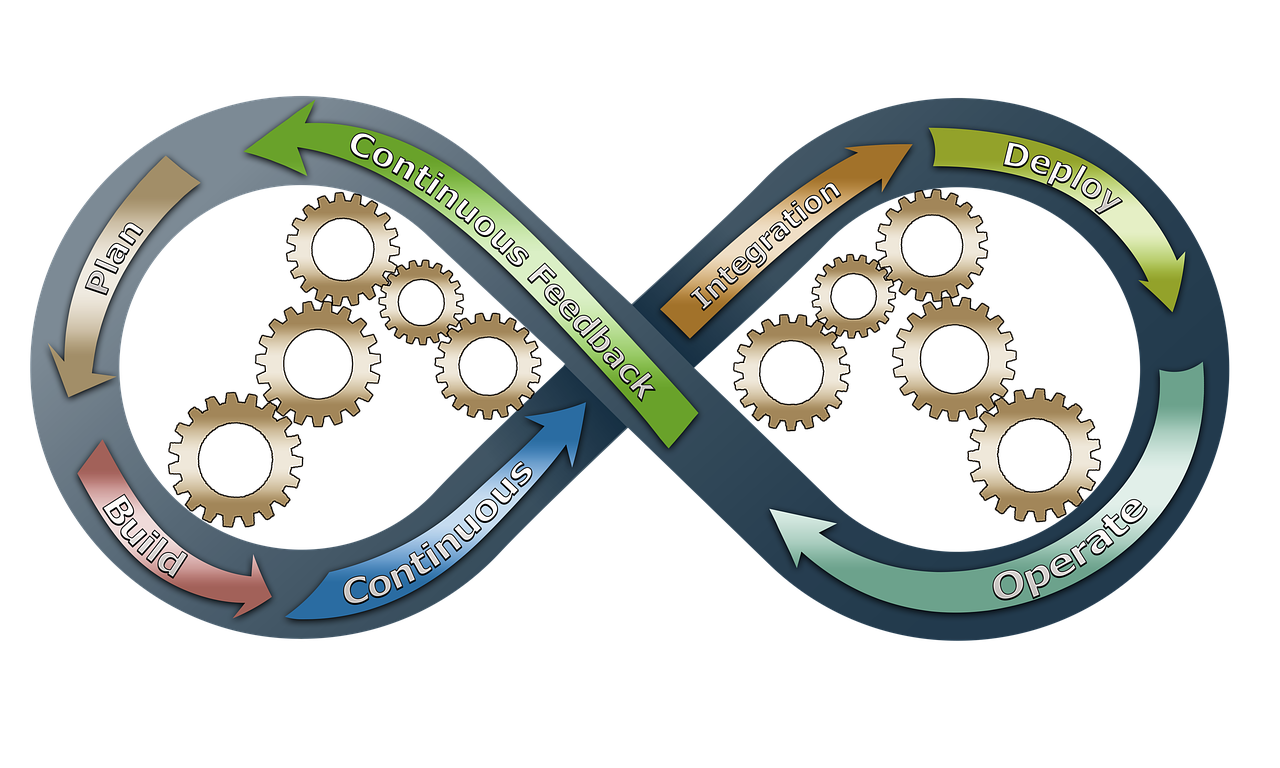
Main Content: Is CI/CD Right For You?

The acronym CI/CD stands for “Continuous Integration” and “Continuous Delivery” and also “Continuous Deployment”.  Usually, perhaps always, CI needs to be implemented before either of the CDs can be implemented.  CI refers to coders pushing code changes to a shared team repository frequently, often multiple times per day.  In many contexts, a build of the software is started once the push into the shared code base is complete.  In some contexts, builds of the shared repository may occur on a regular basis such as every hour.  The benefit of automated builds is to quickly identify cases in which the code changes made by two developers conflict with each other.

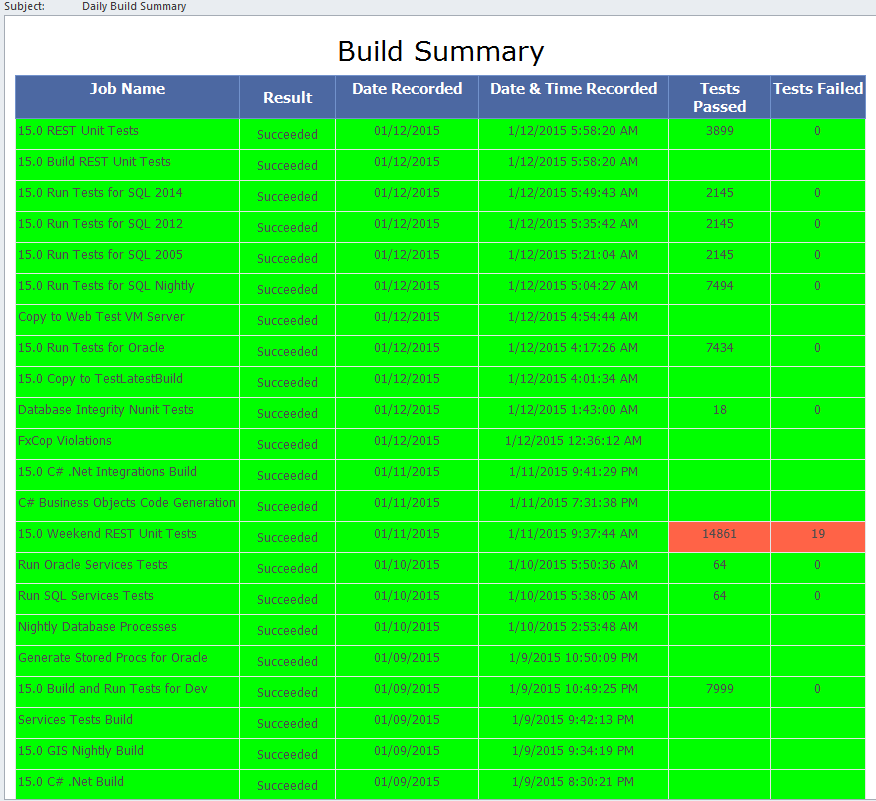
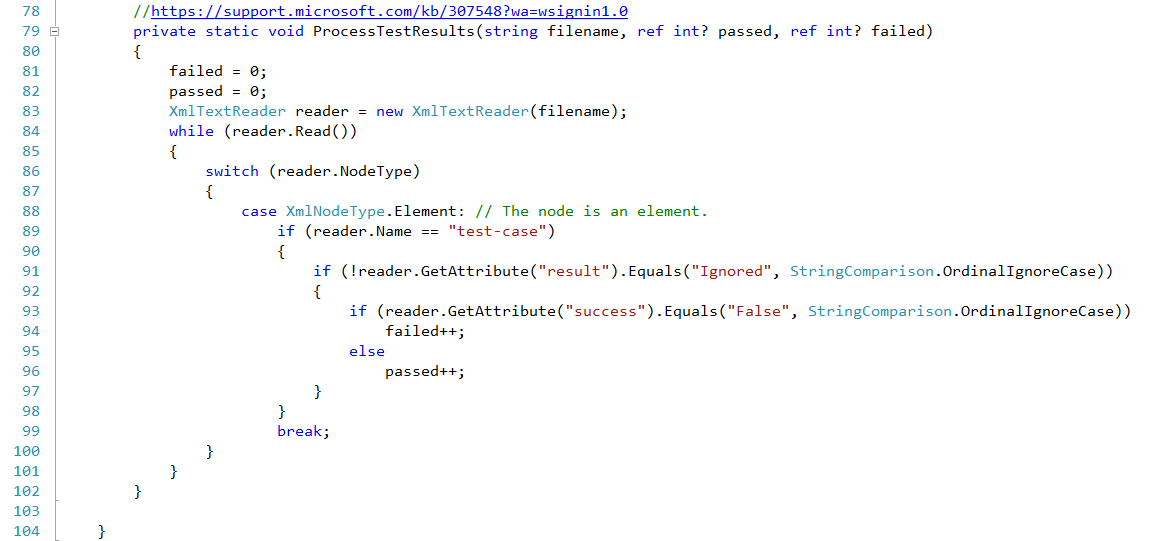
Along with running a build, many CI pipelines perform other tasks on the code.  These tasks include “static code analysis” aka “linting” to determine if the code follows code formatting standards and naming conventions as well as checking the code for logic bugs and bugs that create security vulnerabilities.  Static code analysis may detect if new and unapproved third-party libraries were introduced, or that code complexity levels exceed a tolerance level, or simply if a method has more lines of code within it than is approved by company standards.  If the code compiles and passes the static code analysis checks, it may then have a suite of unit tests and integration tests executed to verify no existing logic in the application was broken by the latest code changes.

CI encompasses two practices; frequent code pushes and automated builds.  Some of the benefits of frequent code pushes include:

  • Developers get feedback more quickly if they have made changes that conflict with something other developers committed,
  • Builds based on the shared repository are less likely to conflict with changes from other developers when the code base the developer is working from is more current and the number of changes made to the code is fewer,
  • Reviewing code of other developers is easier when developers check in frequently because it is likely there are fewer code changes to review,
  • Since code reviews take less time, they interrupt the flow of the developer reviewing the code less,
  • Since code reviews take less time other developers are more willing to perform the code review and are more willing to do it soon.

Some of the benefits of automated builds include:

  • A relatively quick response if code pushed to a shared repository causes a build failure,
  • Relatively quick feedback from static code analysis tools to identify problems,
  • Relatively quick feedback from unit tests and integration tests if code changes created bugs in the application.

CI is very beneficial and invaluable to many software development teams, but it is not necessarily a benefit in all software development contexts.  Some contexts that may gain little value from CI include:

  • When there is only a single developer on the project and a CI environment does not already exist,
  • When developers are exploring a new programming language for development.  In this case, the time required to set up the CI may be more than it is worth for something that might get discarded,
  • When the coding language is a scripting language and there is no compile step,
  • When a team has no automated build currently and creates the compiled version of their product on their local machines to deploy to production.

Should You Make a Process Change?

When evaluating if any process like CI is good for you, the most important factors in making the assessment are:

  • Is it worth my (our) time to implement the process or practice?
  • Will the process improve our product quality?

If the process does not improve quality, which means it doesn’t decrease bugs or decrease security vulnerabilities or improve application performance; and it takes significantly more time to implement the process than it will save by not implementing the process, then you should probably not implement it.

Should You Consider CI?

With this definition of CI and criteria for assessment, I believe that most development teams should consider implementing CI into their development process.

CD Benefits and Drawbacks

The other aspect of CI/CD is CD.  CD stands for either “Continuous Delivery” or “Continuous Deployment” or both.  Both terms imply that successful software builds get automatically pushed into an environment where it can be tested or used, but some teams prefer to use “Delivery” for non-production environments and reserve “Deployment” for the “production” environment.  Also, some teams don’t really automatically deploy the software to an environment after it successfully builds.  Instead, the deployment to an environment requires a button click by an authorized person to proceed.

CD has less adoption than CI, partially because CI is generally a pre-requisite to CD, but mostly because CD is not a good deployment strategy for many software products.  In fact, CD is not even possible for software embedded onto chips and placed into airplanes, cars, refrigerators, rockets, and many other devices.  Nor is CD practical for most desktop applications and applications delivered to phones and other devices through an app store.  CI/CD is most likely useful in the deployment of web applications and web APIs. 

Some of the benefits of Continuous Delivery to a non-production environment include:

  • It forces you to codify everything.  That means you need to figure out how to automate and automatically apply the environment specific configuration values.  You may need to learn how to use containers to simplify deployment and to version control and automate all aspects of devops,
  • It creates possibilities.  For example, once you have taken the time to create a pipeline where your automated build can flow into a deployed environment, you discover you can now easily automate your pen tests and stress tests against a test environment,
  • A developer can test some changes in a deployment environment that they can’t test in the developer’s environment (aka: works on my machine), such as:
    • Changes related to threading behavior in applications,
    • Changes related to users from multiple devices simultaneously using the application,
    • Stress testing the scalability of an application,
    • Testing features affected by security mechanisms such as OAuth and TLS.
  • Developers can get new features into functioning environments faster for the benefit of others,
  • Developers can deploy to testing environments easily without waiting on the devops team or IT team to perform a task for them,
  • It becomes easier to create a totally new environment.  Perhaps you currently have just production and test.  Now you can add a QA environment or a temporary environment relatively easily if all the deployment pieces are automated.

Some of the benefits of Continuous Deployment to a production environment include:

  • Developers can get new features and fixes to production faster.  This is very valuable for static sites.  This is a core feature of most JamStack sites.
  • Developers can deploy without waiting on the devops team or IT team to perform a task for them.

Some of the challenges of Continuous Delivery to a non-production environment include:

  • Applying changes to databases in coordination with changes to code,
  • Interruption of testing by others currently in process,
  • Insuring the correct sequence of deployments when multiple teams are deploying to a shared testing environment and some changes depend on sequence

Some of the impediments of Continuous Deployment to a production environment include:

  • The need for the software to be burned into a physical chip,
  • The need for the software to be published through an app store,
  • The need for lengthy integration testing and/or manual testing before production, often due to the need to insure the software is correct if it is used to keep people alive,
  • The desire by the company to find any problems with the software before customers interact with it.

Should You Consider CI/CD?

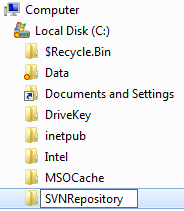
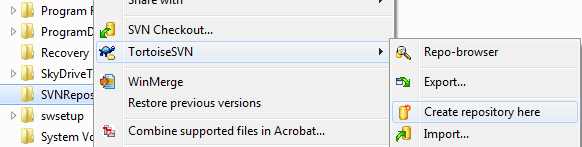
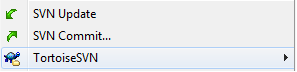
Should you adopt CI and/or CD?  That is a question you need to answer for yourself.  Not only should you consider the benefits and value CI/CD may bring to your development process, you should always also consider if adopting a process is more valuable than other changes you could make.  Just because we recognize the value in implementing a specific change doesn’t mean we should implement it right away.  Perhaps it is more valuable to your company to complete a project you are working on before implementing CI/CD.  Perhaps it is more valuable to wait six weeks for the free training sessions on TeamCity and Octopus Deploy to be available if those are the tools you are considering to use for CI/CD.  Perhaps you are considering moving from subversion to git.  If so, you should probably make that change before you build a CI/CD solution, otherwise you may need to rebuild your CI/CD pipeline completely.  Also, going from manual builds to CI/CD is unlikely to be something completed in a short time frame.  It is something you will progressively implement and adopt more aspects of over time.

I believe that most development teams should consider implementing “Continuous Delivery” into their development process.  “Continuous Deployment” to production is probably primarily of value to teams deploying static web sites, and maybe a few sites with small amounts of data or unimportant data.

Posted in CodeProject, Coding, Dev Environment, Process, Software Development | Leave a Comment »

How To Configure Your .Net Core Web App to Run OutOfProcess and Publish It That Way

Posted by robkraft on May 31, 2020

I put a .Net Core web site on my new webhost, SmarterASP.Net and published it from within Visual Studio 2019 with no problems. A few weeks later I added a second .Net Core web site to my account and published it the same way then discovered my sites were returning 500.34 and/or 500.35 errors.

Both of my sites are running in the same App Pool on IIS and are using the defaults for .Net Core 3.1 which means they are runnning “inprocess”. But we can only have one .Net Core 3.1 app running “inprocess”. I needed to move both of them to run “outofprocess”, which means they will run on Kestrel instead of IIS. I have no concerns about that, but I had trouble figuring out how to tell my “publish” profile in Visual Studio that I wanted the deployed site to run OutOfProcess. There is an option in the Project Properties Debug tab, but that does not carry over to the web.config that gets created when I publish my app through Visual Studio using FTP.

To change a .Net Core 3.1 app to OutOfProcess so that when you publish it the web.config for the published site also uses OutOfProcess, you need to manually edit your .csproj file and add an attribute AspNetCoreHostingModel in the Property Group that has your TargetFramework:

  <PropertyGroup>
    <TargetFramework>netcoreapp3.1</TargetFramework>
    <AspNetCoreHostingModel>OutOfProcess</AspNetCoreHostingModel>
  </PropertyGroup>

Posted in Coding, Dev Environment | 1 Comment »

Run Visual Studio As Admin, Without The As Administrator Prompt

Posted by robkraft on July 10, 2016

I run visual studio as admin just by clicking the icon in the task bar:

AA1

If you would like to do this same thing so that it does not prompt you to “run as admin”, and so that you don’t need to right-click and select “Run as administrator”, you can set up a windows task do this using the following steps:

Open Task Scheduler (click start and begin typing:  Task Scheduler).

  • Select “Create Task”.
  • On the General Tab, give the task a name such as “VS as Admin”.
  • Click on the “Run with highest privileges” checkbox to select it.

aa2.png

On the Actions tab:

  • Create a new Action.
  • Action = “Start a Program”.
  • Program/script = “C:\Program Files (x86)\Microsoft Visual Studio 14.0\Common7\IDE\devenv.exe”.
    • Note: 14.0 references Visual Studio 2015, use 12.0 for VS 2013
  • Click OK to save the task.

Right click on your desktop and select New, shortcut.

  • Set the value to
    • C:\Windows\System32\schtasks.exe /run /TN “VS as Admin”
      • Replace “VS as Admin” with the name of the task you created above
  • Click Next and enter a name for the shortcut, then click Finish.

Right click on your shortcut and select Pin to Taskbar.  It should be ready to use!

Posted in Coding, Dev Environment, Uncategorized | Leave a Comment »

Did your .Net Build Server Run out of Disk Space? Perhaps it was Fusion Log Viewer.

Posted by robkraft on June 26, 2016

A few months ago our nightly build failed because the build machine was out of disk space.  We cleaned up the usual temp files and got it running again, but decided to dig deeper to find things filling up the hard drive.

We discovered we had a folder with millions (literally millions) of small .htm files.  The folder was C:\windows\syswow64\config\systemprofile\appdata\local\content.ie5 and we learned that the source of these files was Fusion Log Viewer from this post by Rich Beales:  http://blog.richbeales.net/2014/04/your-machine-slowly-runs-out-of-disk.html.

I am just blogging about it here so that I can find this post in the future if it happens to me again, and also to elaborate on some details.

The HTML files were small and the content of every one of them was something like this:

<meta http-equiv=”Content-Type” content=”charset=unicode-1-1-utf-8″><!– saved from url=(0015)assemblybinder: –><html><pre>
*** Assembly Binder Log Entry  (2/1/2016 @ 12:00:34 PM) ***

The operation was successful.
Bind result: hr = 0x0. The operation completed successfully.

Assembly manager loaded from:  C:\Windows\Microsoft.NET\Framework\v4.0.30319\clr.dll
Running under executable  C:\WINDOWS\Microsoft.NET\Framework\v4.0.30319\aspnet_compiler.exe
— A detailed error log follows.

=== Pre-bind state information ===
LOG: DisplayName = System.Configuration, Version=4.0.0.0, Culture=neutral, PublicKeyToken=b03f5f7f11d50a3a
(Fully-specified)
LOG: Appbase = file:///C:/Build/ourapp.Internal/
LOG: Initial PrivatePath = C:\Build\ourapp.Internal\bin
LOG: Dynamic Base = C:\Windows\Microsoft.NET\Framework\v4.0.30319\Temporary ASP.NET Files\ourapp.internal\085749fe
LOG: Cache Base = C:\Windows\Microsoft.NET\Framework\v4.0.30319\Temporary ASP.NET Files\ourapp.internal\085749fe
LOG: AppName = f1c160c1
Calling assembly : (Unknown).
===
LOG: This bind starts in default load context.
LOG: Using application configuration file: C:\Build\ourapp.Internal\web.config
LOG: Using host configuration file:
LOG: Using machine configuration file from C:\Windows\Microsoft.NET\Framework\v4.0.30319\config\machine.config.
LOG: Binding succeeds. Returns assembly from C:\Windows\Microsoft.Net\assembly\GAC_MSIL\System.Configuration\v4.0_4.0.0.0__b03f5f7f11d50a3a\System.Configuration.dll.
LOG: Assembly is loaded in default load context.

</pre></html>

The really odd thing for our team is that none of us know what Fusion Logger is about, or that it existed, or how it could have been turned on.  We are suspicious that a .Net or Visual Studio update may have turned it on.  Regardless, to shut it off we tracked down the FusLogVw.exe and changed it from “Log all bind to disk” to “Log disabled”.

image002

Final note, when you decide to delete the files, do so by deleting the whole directory (rd foldername /S), otherwise it make take you days to delete the all.

Posted in Coding, Dev Environment | Leave a Comment »

Is 2016 the Year to Stop Bundling Javascript and CSS?

Posted by robkraft on December 13, 2015

If you don’t stop bundling your javascript and CSS in 2016, you will probably do so in 2017 or 2018 and the reason for this is the implementation of HTTP2. HTTP2 is a new spec to replace HTTP and requires changes in both browsers and the web servers they connect to. Once each side of the communication supports HTTP2, the improved communications can begin using the new spec. Going into 2016, most major browsers such as Chrome, Firefox, and Edge support it; but I am not sure about IE11.

HTTP2 is not a rewrite of HTTP, but an alteration of a few features. One of the most notable is the ability for the browser to bundle multiple requests together to send them to the server. This is why developers should consider ending the use of bundling javascript and CSS on the server, as it may provide worse performance to clients running HTTP2. For a good podcast about the impact of HTTP2, I recommend show 1224 of .Net Rocks: http://www.dotnetrocks.com/?show=1224

Developers should keep the following in mind regarding HTTP2:

  • Bundling of javascript and CSS may provide worse performance than not bundling for clients using HTTP2.
  • Communications that are not using HTTP2 will still benefit from bundling.
  • Some browsers, notably Chrome and Firefox, may only support HTTP2 when the connection uses TLS/SSL.
  • Proxies in between the client and the server that don’t support HTTP2 may also affect the improvements HTTP2 would otherwise provide.

For a little more about the spec, I recommend this concise post from Akamai: https://http2.akamai.com/. And don’t overlook their awesome demo example of the improvements HTTP2 can provide: https://http2.akamai.com/demo.

Posted in Coding, Dev Environment, I.T., Uncategorized, Web Sites | Leave a Comment »

A Simple Build Summary Email For Your Development Environment. Tests Included!

Posted by robkraft on January 13, 2015

We cobbled together a simple system to provide us a single email each day to tell us if all of our jobs and unit tests were successful on their overnight runs.

An example of our daily build summary email.

An example of our daily build summary email.


Given that we have a dozen different jobs that run tests and a dozen that run builds it was helpful to have the results of all the jobs in a single email. To implement this similar to what we did you need the following:

  • A database for storing the results of the jobs. We used SQL Server.
  • A program to write the build results to the database. The C# program we wrote is provided here.
  • A few modifications to your build scripts. Our changes to our Nant builds are shown here.
  • Optionally a testing framework that produces output you can read easily.  We use nunit.
  • A report sent via email. We used an SSRS report to send the email summary each morning.


Here is how we did it:

1) We created a table in SQL Server to store the results of each job.

SQL for Creating Table ZBuildJobs

SQL for Creating Table ZBuildJobs

Here is a sample of the table with data:

Sample Of Table ZBuildJobs with data

Sample Of Table ZBuildJobs with data


2) We created a program that we could call from a command prompt and pass a few parameters to write into the table.   This is our C# program.  It is comprised of just 3 methods.

The App entry code reads the command line arguments.  If there are more than 2 (> 3 in code) then we also look for a number of tests passed and failed to be passed in.

Code Part 1

Code Part 1

The CallDatabase method simply writes the values passed in to the database table.

Code Part 2

Code Part 2

The ProcessTestResults method uses some example code from the Microsoft URL shown to read the results of the nunit test file and count the number of passed and failed tests.

Code Part 3

Code Part 3


3) We modified our nant build files to call the program written in step 2 and pass in a value of success or failure.  For nunit test jobs we also pass in the XML results file created by our nunit tests.

  • Nant includes some built-in properties that we can use to specify a target to call when the nant job succeeds or fails.  So we configured those properties like this:
    • <property name=”nant.onsuccess” value=”BuildSuccess” />
    • <property name=”nant.onfailure” value=”BuildFailure” />
  • For ease of maintenance, we created a property to hold the name of our program from step 2 above that does the logging:
    • <property name=”param.EventLogPgmName” value=”C:\Dev\BuildLogger\BuildLogger.exe” />
  • To include spaces in our job names we need to surround the parameters we pass to BuildLogger with double quotes, and to include double quotes as part of the parameters we needed to create a property to hold the double quotes.  We also have a property to hold our current build version number:
    • <property name=”dq” value='”‘/>
    • <property name=”project.version.full” value=”15.0″/>
  • Then at the start of each build target we add a name for that build, something like this:
    • <property name=”param.BuildNameForLog” value=”${dq}${project.version.full} C# .Net Build${dq}” />
  • If the job runs unit tests, we include a property to specify the name of the unit test output file:
    • <property name=”param.TestResultsFile” value=”${dq}c:\program files (x86)\NUnit\bin\TestResult.xml${dq}” />
  • The final change to our build files is to declare the targets for BuildSuccess and BuildFailure.  These look like this:
    • <target name=”BuildSuccess”>
      • <exec program=”${param.EventLogPgmName}” commandline=” ${param.BuildNameForLog} Succeeded ${param.TestResultsFile}” failonerror=”true”/>
    • </target>
    • <target name=”BuildFailure”>
      • <exec program=”${param.EventLogPgmName}” commandline=” ${param.BuildNameForLog} Failed” failonerror=”true”/>
    • </target>

4) The last step is to build the report.  If you are already familiar with SSRS you will probably find this step to be very simple.  SSRS is easy to use and is free if you have a Standard Edition of SQL Server.  Here I share the more advanced features for the report.

This is the SQL to get the most results of the most recent execution for each job:

SQL for Report

SQL for Report

For each job listed on the report we want to show the record in green (Lime) if it passes and red (Tomato) if it fails.  So I modified the BackgroundColor property of each row and gave it this expression:

=IIF(Fields!Result.Value = “Succeeded”, “Lime”, “Tomato”)

For the two columns with the number of tests that passed or failed, I had to test if the field had null first, then apply the color:

=IIF( IsNothing(Fields!TestsFailed.Value), IIF(Fields!Result.Value = “Succeeded”, “Lime”, “Tomato”), IIF(Fields!TestsFailed.Value > 0, “Tomato”, “Lime”))

We have been very pleased with the results of our Build Summary process and continue to add more things to it.  It was easy to implement and has ran very reliably.


You can download the code from here: http://www.kraftsoftware.com/BuildYourOwnSummaryEmailCode.zip

Posted in CodeProject, Coding, Dev Environment, Process | Leave a Comment »

Quickly Get Started With Subversion Source Control in April 2013 – Download, Install, and Use

Posted by robkraft on March 31, 2013

Once in a while I take over a software development project that is not using source code control. If I expect to make a lot of changes I usually set up source code control before I start so that I can easily revert changes I made if I need to. I don’t do this often, so I’m documenting the steps for a quick installation of subversion with minimal source control features for my own future reference.

I felt the urge to write this post for two reasons:

  1. To easily find the correct URLs to use to download the software
  2. To provide simple documentation for a simple installation. There is a lot of good extensive documentation explaining all the options, but I don’t care about most the options. I just wanted the basic installation so that I can get to work. And here it is.

Downloading and Installing the Version Control Software

A Google search for subversion will almost certainly take you to the old web site for subversion.  So skip it.  Download subversion from here:  http://www.visualsvn.com/downloads/  The first link is probably Apache Subversion Command Line tools, version 1.7.8 and about 2MB.  That is the one you want.  Ignore the misleading fact that it is has Apache in its name.  As a windows developer, that information is irrelevant, and frankly, misleading.  Download the file and unzip it to c:\program files\subversion.

Subversion does not include a user interface.  Everything is done from a command line.  So let’s get a user interface for subversion so that we can avoid hours making typos at the command line.  The challenge is to download TortoiseSVN without downloading the other crap put in front of you on the web pages.  This is not easy because huge download buttons will be placed in front of you on most the pages they force you to navigate through and they all download crapware.  So avoid the tortoiseSVN site and go straight here http://sourceforge.net/projects/tortoisesvn/files/latest/download.  This will download either the 64bit or 32bit version based on the OS you are running your browser.  Download it, then run the installer exe.  Take the defaults.

Creating a Repository to Store the “Master” copy of your software.

Now for the hard parts.  Subversion uses poor terminology, in my opinion, for  the actions you need to take to get started.  Conceptually, we want to do the following:

  1. Create a place on the computer to store the “Master Copy” of our source code, called the repository.
  2. Upload our existing source code into the repository
  3. Flag the working directory of our source code as a working directory for that repository.
  4. Make a change, test that subversion recognizes the change.

I recommend you back up your source code root folder to a backup folder at this time.

Create a folder on your computer to contain the Repository.  This is not going to contain the “working copy” of your code, it will contain the “Master” copy.  I recommend something like c:\SVNRepository.

Creating a Folder in Windows

  1. Right click on the folder you just created.  The TortoiseSVN tools should provide you an option to “TortoiseSVN\Create repository here”                             Create Repository Here for Subversion
    1. Do NOT click Create Folder Structure, just click OK.
  2. Now go to the root folder that holds your source code (let’s assume it is c:\DevSource).  Right-click, choose “TortoiseSVN\Import”

     Image of Import

    1. Clear the “URL of repository, then click the … button to the right”.  Navigate to the folder of your repository (c:\SVNRepository)
    2. Click okClick OK to import
  3. Now, to designate the location you imported from as the working copy of your project, right click on the folder you imported from again, and select SVN Checkout

    Checkout from Svn

    1. Careful – the “URL of repository” should be the full path to c:\svnrepository
    2. You may need to change the defaulted value for Checkout directory because the UI may add svnrepository at the end of the path name.  Take that off.  The checkout directory should be the root level of your project folder (c:\DevSource)
    3. It will warn you that the folder is not empty.  This is good – you are going to overwrite your existing project files with the files you imported into the repository.
    4. If you did this correctly, all your files will still contain their original date/times.
    5. If you did this correctly, and you right click on your project root folder, you will have two new options above TortoiseSVN on your menu, SVN Update and SVN Commit:

    Confirm SVN Folder

If you had any trouble, delete SVNRepository, copy the backup you made of your source files back into your project folder, and try again.

Posted in Dev Environment | 4 Comments »

Subversion 1.7 provides a big performance boost!

Posted by robkraft on March 4, 2012

Last week we decided to install the latest version of subversion just to see if it fixed any minor bugs or could speed up performance a little. I’m thrilled to report that it improved performance by a lot, not a little! We can pull data out of the repository three times faster than before, and checkins and all other features of subversion are much faster. Subversion got a major redesign and refactor in release 1.7 that greatly affects performance on Windows. If you are using subversion on Windows, go out and get this great upgrade as soon as possible.

We use the subversion from Collabnet, and they provide a video and other great information free about the changes in subversion that have made it so much better.

Another important action item to take away from this is that all software development shops should examine upgrading all of their tools regularly to the latest release and service pack. Software developers know these upgrades can fix bugs, fix security flaws, offer new features, and, as in this case, provide large performance improvements. Make a list of all of your tools and then make a task to consider upgrading each tool at least once a year.

A big thank you to the team that contributes to subversion at Collabnet!
http://www.open.collab.net/downloads/subversion/

Posted in Coding, Dev Environment, Process | Leave a Comment »

Get started using FxCop against your nightly build without first resolving all the violations

Posted by robkraft on February 13, 2012

FxCop is one of the best known free static code analysis tools available for .Net software. Version 10.0 of FxCop was published in June of 2010 and is available for download here (http://www.microsoft.com/download/en/details.aspx?id=6544). FxCop is easy to install and use to analysze your code for potential problems, but I think the real value of FxCop is when you run it every night against your nightly build and receive a report via email of new violations recently introduced in your code. I have long believed this to be the best use and value of FxCop, but only recently implemented it. And the reason I only recently implemented nightly scans of our code using FxCop is because when I run the tool I get a report with thousands of violations. Ouch! Are all these violations things I really need to fix? The answer for me, and likely the answer for you, is no. However, a lot of the violations should be fixed.

I think of the violations in these groups:

  • Violations like misspelled words that are not misspelled, but just need to be added to a custom dictionary so that they are no longer flagged as violations.
  • Violations that could, and would, cause problems if that bit of code was ever used in ways others than intended, but I know that won’t happen.
  • Violations that would be problems if the software runs in other countries using different languages, different date/time formatting, etc.
  • Violations that really are problems we should fix.
  • Violations that represent waste such as methods that are never called.

So, as I stated we have thousands of violations across all of our code, but I didn’t want to implement the nightly FxCop scan until all of those were resolved. If you look at the categories I used for the problems, many of the violations are not worth our time to resolve because we have more valuable work to do right now. So how could we begin using FxCop regularly, without fixing all the problems? We did it by disabling rule checking for all the rules that were currently failing. Then we set up the automated job to run FxCop every night against our compiled assemblies. Doing it this way gives us a starting point, and it keeps us from violating many of the rules defined in FxCop. Our next step is to begin turning on rules and fixing them one by one. Of course we will start with the important or easy violations and work our way down the list until we have them all re-enabled.

From a high-level perspective, you have to perform just two steps:

  1. Build your FxCop project files that analyze your assemblies and ignore failing rules.
  2. Build your nightly batch job to run against all the assemblies and email results to you.

Some tips before you begin:

  • Tip #1 – Use the same directory path for the DLLs you analyze with FxCop on both your developer PCs and your build machine. FxCop stores the path to the DLLs you select in the .FxCop configuration file. If the path is the same between your developer PC and the build PC, then you can easily configure FxCop on your PC and it will run without modification on the build computer.
  • Tip #2 – Do not plan to use one .FxCop project to scan all your assemblies unless you have just 10 or 20 assemblies. At some point, .FxCop fails to work when too many assemblies are loaded.
  • Tip #3 – FxCop does not work on Silverlight projects.

Here are the steps I recommend:

  • Step #1 – Add all the assemblies for your logical group into the .FxCop project and analyze them. Logically group the DLLs and Executables you analyze.
  • Step #2 – Copy the CustomDictionary.xml file provided by FxCop into the folder you with your FxCop projects, modify the CustomDictionary to recognize some of your acronyms and names as valid – not violations.
  • Step #3 – Sort the results of the analysis by Rule, then from the Rules tab go through and deselect all the rules that you have violations for. Save the .FxCop project file.
  • Step #4-n – Use the .FxCop file you saved as the starting point for the next group of assemblies you desire to analyze (save it with a different name of course). Exclude all the targets from the first analysis and add your new set of targets.
  • Step #5 – We use nant in our nightly processes, and nant includes a task specifically for running FxCop. Here is how we do it. Create a batch file to run nant:
cd\
cd\dev\fxcop
REM This next line appends the FxCop directory to the existing path so we can run FxCop from any folder
PATH %path%;c:\program files\microsoft fxcop 10.0
C:\WINDOWS\system32\nant.bat fxcop -logger:NAnt.Core.MailLogger
  • Step #6 – Configure an nant .build file for executing FxCop. Ours looks something like this:
  • <?xml version="1.0" encoding="utf-8" ?>
    <project name="FXCOP" default="build"  xmlns="http://nant.sourceforge.net/release/0.86-beta1/nant.xsd">
    	<property name="MailLogger.mailhost" value="smtp.ourdomain.com" />
    	<property name="MailLogger.from" value="build@ourdomain.com" />
    	<property name="MailLogger.success.notify" value="true" />
    	<property name="MailLogger.success.to" value="developers@ourdomain.com" />
    	<property name="MailLogger.failure.to" value="developers@ourdomain.com" />
    	<property name="MailLogger.success.subject" value="FXCop Violations" />
    	<property name="MailLogger.failure.subject" value="FXCop Build Failure" />
    	<property name="MailLogger.success.attachments" value="MailLogger.success.files" />
    
    	<fileset id="MailLogger.success.files">
    		<include name="ProjectGroup1.html" />
    		<include name="ProjectGroup2.html" />
    	</fileset>
    
    	<!-- this loads any required dependencies that nAnt needs to do all of our tasks-->
    	<loadtasks assembly="C:\Program Files\nAnt\Contrib\bin\NAnt.Contrib.Tasks.dll" />
    <target name="fxcop">
    	<fxcop analysisReportFilename="ProjectGroup1.html" applyOutXsl="true" includeSummaryReport="true" projectFile="MinimalRulesGroup1.FxCop"/>
    	<fxcop analysisReportFilename="ProjectGroup2.html" applyOutXsl="true" includeSummaryReport="true" projectFile="MinimalRulesGroup2.FxCop"/>
    </target>
    </project>
    
  • Step #7 – Over time, enable rules in FxCop and resolve the violations that arise. Eventually, hopefully, you will be able to get all of your code to pass all FxCop rules.

On a final note, I’d like to make sure you are aware that you can also write your own FxCop rules to ensure the code your team is written follows your shop standards.

Posted in CodeProject, Coding, Dev Environment, Process | 1 Comment »

Resolving missing System.Windows.Forms.DataVisualization in nant build

Posted by robkraft on December 11, 2011

We added some new features in our code this week that required System.Windows.Forms.DataVisualization. No problem until we ran the nant build and it failed with:

The type or namespace name 'DataVisualization' does not exist in the namespace 'System.Windows.Forms' (are you missing an assembly reference?)

We tried copying the DLL several places, even though we later discovered this was unnecessary. The DLL exists in the GAC and we only need to add the reference to the DLL in the nant .build file.

It turns out that the problem exists in the nant.exe.config file we use. This file notoriously has several errors and needs to be updated. I found a copy of nant.exe.config that we need at http://pastebin.com/YxxaKADS. I simply copied the 2 lines at 121 and 122 and pasted them into our nant.exe.config build file and the problem was solved.

121. <include name="System.Windows.Forms.DataVisualization.Design.dll" / >
122. <include name="System.Windows.Forms.DataVisualization.dll" / >

Posted in Coding, Dev Environment | Leave a Comment »